Monday, August 4, 2008

Technique Photoeffect Superimpose

[1]-First of all Open Any image of Fruits as i did take following image of Apple with the help of Ctrl+O
[2]-Now change the Blende Mode of this Layer.Blende Mode should ‘Exculsion’

[3]-Now your image should look like as shown below

[4]-Now make the Duplicate Layer with the help of Ctrl+J & then Blende of this Layer should ‘Difference’

[5]-Now your image should look like as shown below

[6]-Now Open the other image of Globe & drag the Globe image in First image with the help of Move Tool

[7]-Now press Ctrl+I & your image should look like as shown below
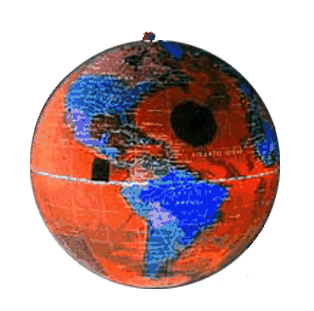
[8]-Now Blende Mode of this Layer should ‘Exculsion’

[9]-Now your image should look like as shown below

[10]-Now Remove the Outer parts of Globe with the help of ‘Erase Tool’.
Thanks for read this photoshop Tutorial.I hope U have enjoyed & learn some tips & techniques.The Final Output of this
Tutorial is shown below

adobe photoshop 7 tutorial

adobe photoshop bubble

adobe photoshop cs2 text

Saturday, August 2, 2008

Gold Rims

Your ride is not so fly? Pimp it out by throwing on some new D's. In this tutorial, you'll learn how to change the color of your rims to gold. Now you too can ride in style.

First off we have to pick out a car. Any car will do the job just fine; I went with the poor man’s Ferrari/Corvette ZR1.
Before doing anything, make sure you have your pen tool set to the following settings.


Make a new layer and zoom in about 800%. Start outlining the wheel on the car and make your way around the wheel until the pen dots disappear and a circle forms.

Using the color #dfc855 fill in the circle and set the blending option to color burn.


Repeat the same procedure until all the wheels are gold.


And if you want to make the color lighter or darker just simply duplicate the color layer and change the blending option to multiply (darker) or soft light (lighter).